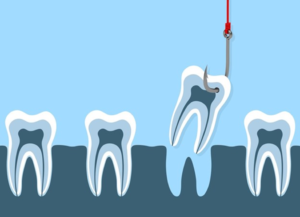
If your dentist has recently suggested a tooth extraction upon examining your mouth, you may not know what to think. After all, parting with one or more of your pearly whites might seem scary, but believe it or not, your dentist is putting your oral health above all else! Keep reading to learn a little more about what to expect throughout the tooth extraction process so that you can head into it with confidence and poise.
Breaking Down the Tooth Extraction Process
You can rest assured that if your dentist has informed you that you’re going to need to undergo a tooth extraction, it’s absolutely necessary—otherwise, it wouldn’t have been suggested as an option in the first place! Your natural teeth are the best tools at your disposal for biting, chewing, talking, and so on, and they’re only removed when they pose a threat to your oral health. That said, here’s a breakdown of the steps of the process and what you can expect to feel throughout each one:
Step #1: Numbing Your Mouth
Your comfort is something that your dentist will always have in mind, so they’ll take the appropriate measures to ensure that you feel no pain whatsoever during your extraction. This is achieved with the help of anesthesia, and sometimes sedatives if necessary. Your tooth and the surrounding gum tissue will be wholly numbed for the entire duration of the procedure, period.
Step #2: Removing Your Tooth
If the tooth in question is above the gum line, your dentist can operate forceps and elevators to remove it from the socket. If it’s deep-rooted or well beneath the gums, surgical extraction can be utilized. In some cases, bone fragments or spurs might be present that warrant removal. You might feel some pressure during this part of the process, but you shouldn’t feel any outright pain.
Step #3: Cleaning and Closing the Socket
After the tooth has been fully removed, the area is cleaned to ensure all bone fragments are removed before the gum tissue is closed up using sutures or stitches. This helps to prevent infection and halt excessive bleeding.
Step #4: Controlling the Bleeding & Swelling
Your dentist will place gauze on your extraction site to help control the bleeding; applying firm pressure on your end assists with this. You’ll also be instructed to use an ice pack on your cheek to assist with swelling; periodic 20-minute sessions should suffice.
Step #5: Following Post-Op Instructions
You aren’t out of the woods just yet; following your post-op instructions closely is perhaps the most important aspect of tooth extraction recovery! You will need to take your prescribed and over-the-counter medications as instructed, avoid smoking or using tobacco, refrain from drinking using a straw, and stick to a soft foods diet. You’ll also need to gently rinse your mouth with salt water the day after your extraction and show caution when brushing around the surgery site.
If you do things correctly, you shouldn’t experience any painful setbacks such as dry sockets, which occur when the protective blood clot that forms over the surgical site is dislodged. In any case, if you’re suffering from excessive pain, swelling, or bleeding, you shouldn’t hesitate to contact your dentist!
About the Practice
The skilled team at Baldwin Family Dental is proud to provide patients and families in the Panama City, FL area with an unmatched level of dental care. The practice is excited to offer a wide range of preventive, cosmetic, and restorative services geared toward helping you and your loved ones maintain optimal oral health. They’re also pleased to offer tooth extractions for patients with problematic teeth! If you have any questions about the blog or you need to schedule a visit for you or someone you know, don’t wait to contact the practice today either online or by phone for additional information. Telephone: (850) 215-0128.
